Boost Your Confidence Through Small Achievements
If you have ever felt stuck waiting for a big breakthrough before you allow yourself to feel proud, you are not alone. Many people tie their confidence to massive wins—a promotion, a viral post, or a perfect product launch. But real, lasting confidence grows from something far steadier: small, consistent achievements. The message behind Boost Your Confidence Through Small Achievements is not just a slogan for a T-shirt design. It is a practical philosophy that can reshape how you work, create, and evaluate your progress. Whether you are a freelancer building a brand, a small business owner printing merchandise, or someone simply looking for a daily reminder, understanding how to use and apply this concept—and the design assets that come with it—can save you from common frustrations.
Why Small Wins Matter More Than You Think
Confidence is not something you either have or do not. It is a skill you build layer by layer. When you accomplish something small—finishing a draft, organizing your files, or completing a single design mockup—your brain registers success. That success releases dopamine, which makes you feel capable and motivated to take the next step. The mistake many people make is skipping this process. They set huge goals, fail to meet them, and then interpret that failure as a personal shortcoming. The truth is that the gap between where you are and where you want to be is best crossed by many small steps, not one giant leap.
This is where the design itself becomes useful. Wearing or displaying a message like Boost Your Confidence Through Small Achievements serves as a visual anchor. It reminds you, and those around you, that progress matters more than perfection. But to get the full benefit, you need to use the design correctly—and avoid the common pitfalls that turn a good idea into a wasted effort.
Mistake One: Rushing to Print Without Checking File Formats
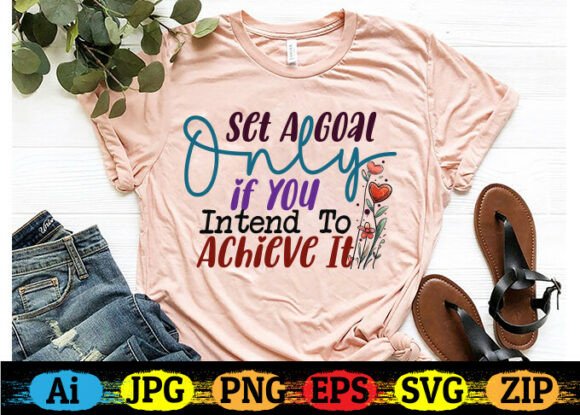
The design bundle includes five formats: JPG, AI, SVG, EPS, and Transparent PNG. Each format serves a different purpose. The most frequent mistake people make is downloading the ZIP folder, extracting the files, and then trying to print the JPG directly onto a dark T-shirt without realizing the background is not transparent. The result is a white box around the text, which looks unprofessional and cheap.
To avoid this, understand what each format does. The transparent PNG is ideal for light-colored fabrics because you can place it over any background without a visible edge. The AI, SVG, and EPS files are vector formats, meaning they scale to any size without losing quality. If you plan to print on large items like tote bags or posters, use a vector file. If you are sublimating onto polyester, the transparent PNG at 300 dpi is your best choice. Always double-check your printer's requirements before opening the file.
Another overlooked detail is the resolution. The transparent PNG is 4500×5400 pixels at 300 dpi, which is excellent for most print jobs. But if you scale it up beyond its original dimensions in a low-resolution software, you will get pixelation. Use vector files for scaling, and use raster files only at their native size or smaller.
Mistake Two: Ignoring the ZIP Folder Extraction Step
This sounds obvious, but many people double-click the ZIP file, see the contents, and try to edit or print directly from within the compressed folder. This can cause errors, missing files, or corrupted data. The files are compressed into one ZIP folder for easy download and transfer. You must extract them—either by right-clicking and selecting "Extract All" on Windows or by double-clicking and dragging the files out on Mac—before you open them in any software. Working directly inside the ZIP can also prevent your editing program from saving changes properly.
A simple habit: create a dedicated folder on your desktop or cloud drive named after the design. Extract all files into that folder before you do anything else. This keeps your workflow clean and prevents accidental loss of files.
Mistake Three: Using the Wrong Software for Editable Files
The AI file requires Adobe Illustrator to open and edit fully. The EPS file can be opened in many vector programs, but some free software may flatten layers or remove text formatting. If you try to open the AI file in a basic image viewer, you will see a preview but cannot make changes. This leads people to believe the file is broken when it is not.
If you do not own Adobe Illustrator, use the SVG file. SVG is a widely supported vector format that works in free tools like Inkscape, Canva (pro version), and even web browsers for preview. You can change colors, resize, and add effects without losing quality. If you only need a static image, the high-quality JPG or transparent PNG will work fine. Know your tools before you choose your format.
Mistake Four: Overlooking the Design's Purpose on Different Products
The description states this design can be used on shirts, cups, bags, decals, and stickers. Each surface has different requirements. Printing on a mug requires a heat press and sublimation paper. Printing on a sticker requires a cutting machine if you want shaped edges. Printing on a dark T-shirt requires a white underbase or a transfer paper designed for dark fabrics. The design itself is only one part of the process. The substrate, the ink, and the application method all affect the final result.
A common frustration is buying a digital design, printing it on a regular inkjet paper, ironing it onto a dark shirt, and watching it wash out after one cycle. That is not the design's fault. It is a mismatch between the file and the method. Research the printing technique that matches your product. Sublimation works best on polyester. Heat transfer vinyl works well on cotton. Direct-to-garment printing is great for detailed designs. The transparent PNG and vector files give you flexibility, but you still need the right materials.
What to Check Before You Buy or Use This Design
Before you download or purchase any motivational design bundle, ask yourself a few questions. First, what product will you put it on? This determines which file format you will actually use. Second, what software do you have access to? If you cannot open AI or EPS files, lean on SVG and PNG. Third, what is your skill level with editing? If you are a beginner, start with the ready-to-use PNG and avoid the vector files until you feel comfortable. Fourth, check the license terms. Many design bundles permit personal and small commercial use, but if you plan to sell hundreds of shirts, you may need an extended license. The description suggests this is for shirts, cups, bags, decals, and stickers, so confirm that your intended use falls within the allowed scope.
Another point to verify is the resolution. 300 dpi at 4500×5400 pixels is high quality. But if your printer requires a different resolution, or if you need a specific aspect ratio, you may have to crop or resize. The vector files solve this because they are resolution-independent. If you anticipate needing different sizes for different products, the AI, SVG, or EPS files are your best investment of time.
Practical Advice for Getting the Most Out of the Design
Start by picking one product and one file format. If you are making a T-shirt for yourself, use the transparent PNG on a light-colored shirt. Test the print on a scrap piece of fabric or paper first. Check the colors. Check the size. Adjust if needed. Once you are happy, scale up to more products.
If you are a small business owner, consider using the design as part of a limited drop. The motivational message resonates with many people, especially those who feel overwhelmed by large goals. Pair it with a social media post about the psychology of small wins. Tell your customers why you chose that message. People connect with stories, not just graphics. The design becomes a conversation starter, not just a decoration.
For educators or coaches, this design works well on handouts, notebooks, or classroom posters. Use the SVG file to resize it for a banner or a bookmark. The flexibility of the bundle means you are not locked into one format. Keep the files organized and labeled so you can find them later when inspiration strikes.
Better Approach: Pair the Design with a Small Win Habit
The design itself is a tool, but the real value comes from living the message. Create a habit of noting three small achievements at the end of each day. It could be as simple as replying to a client email, organizing your desktop, or finishing a sketch. Then, wear the T-shirt or display the decal as a reminder. The design reinforces the habit, and the habit builds the confidence. Over time, you no longer need the external reminder because the internal belief has taken root.
Avoid the trap of buying multiple designs and never using them. Choose one that resonates, apply it to a product you will actually use, and let it serve its purpose. The design bundle is a starting point, not an end point. The confidence comes from the action you take after you see the words.
Final Thoughts on Using This Design Effectively
The phrase Boost Your Confidence Through Small Achievements is more than a decoration. It is a strategy for sustainable growth. The design bundle gives you professional-quality files in multiple formats so that you can apply that strategy to real products. Avoid the common mistakes: check your file format, extract the ZIP, use compatible software, and match the file to your printing method. Take a few minutes to plan your project before you open the files. That small investment of time will save you from wasted materials and frustration.
Whether you are printing for yourself, your small business, or as a gift, the best results come from preparation and understanding. The design is ready. The message is timeless. Now all you need is the intention to take that first small step.