Using the Christmas Snowman Tree Coquette PNG in Your Creative Workflow
Holiday design projects often require assets that feel both festive and distinctive. The Christmas Snowman Tree Coquette PNG offers a ready-made illustration that blends whimsy with a carefully curated aesthetic. For anyone producing seasonal content—whether for print-on-demand products, social media graphics, or handmade goods—understanding how to integrate this type of asset into your workflow can save time while maintaining a consistent visual identity.
This article walks through practical ways to use this particular design, from planning stages through final production, with attention to file preparation, compatibility, and long-term asset management.
What the Christmas Snowman Tree Coquette PNG Brings to a Project
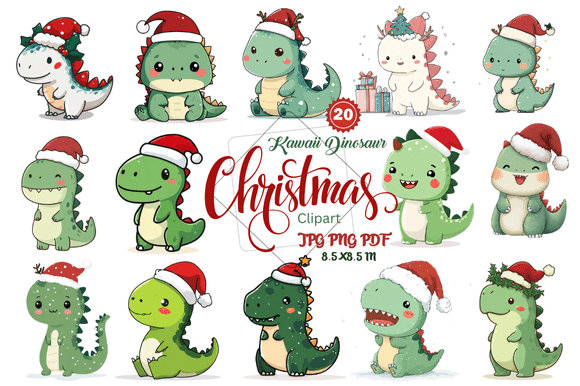
At its core, this PNG delivers a complete scene: three stacked snowmen dressed in pink and mint green accessories, a decorated Christmas tree with pink garlands and stars, and a black-and-white polka dot bow at the top. The palette and styling lean into retro, vintage, and boho influences, making it a fit for projects that aim for a softer, more decorative holiday look rather than traditional red-and-green.
The file comes as a single PNG within a ZIP folder. This format matters because PNG preserves transparency and supports detailed gradients or soft edges—useful for layering onto different backgrounds or combining with other elements. Because it is a PNG rather than a vector, you work with a fixed resolution, so planning the output size early becomes important.
Where This Asset Fits in a Creative Workflow
Integrating a pre-made graphic like this one typically occurs in the middle of a project lifecycle—after concept and color palette decisions, but before final layout and production. If you run a print-on-demand shop, design custom cards, or produce seasonal digital content, this PNG can serve as the central visual around which you build the rest of your composition. Alternatively, it can function as an accent element within a larger design, such as a corner graphic on a poster or a focal image on a mug.
The key is to treat it as a foundational asset, not as an afterthought. When you know the graphic's color story and style upfront, you can plan your typography, supporting graphics, and material choices around it rather than trying to force it into an existing layout.
Planning Before You Open Your Design Software
Preparation determines how smoothly any graphic integrates. Before you unzip the file, consider several factors that will affect your final output.
Output Medium and Size Constraints
PNG files are resolution-dependent. If you plan to print on large-format items like pillows or framed art, check the file's pixel dimensions against your required print resolution. For a standard 300 DPI print, you need roughly 2400 x 3000 pixels for an 8x10 inch print. If the provided PNG falls short, you may need to use it at a smaller scale or incorporate it as part of a larger layout rather than as a full-bleed image.
For digital use—social media posts, blog headers, or email graphics—resolution is less of a constraint. A well-sized PNG for web typically works at 72 DPI, and the file's transparency lets you overlay it on custom backgrounds without hard edges.
Color Palette Alignment
The pink and mint green palette is specific. When you incorporate this graphic into a product mockup or a multi-element design, ensure that your other design elements—fonts, borders, background colors, additional graphics—fall within a complementary range. Pulling a color sample directly from the PNG using a eyedropper tool in your design application helps maintain consistency. You can then build a small color swatch from that sample to use across your project.
Licensing and Usage Boundaries
Understanding the terms that come with this PNG is a practical step that affects how you can use it commercially. The permitted usage includes incorporating the graphic into printed products, print-on-demand items, and digitally finished products that have been modified as part of an original design. Prohibited actions include reselling the image in its original format or offering it as a freebie or gift. This means the asset works well for production but not for redistribution as a standalone graphic.
For a small business owner or freelancer, these terms are straightforward: use the graphic to create finished goods, but do not sell the PNG file itself. Keep a copy of the terms in your project folder for reference, especially if you sell across multiple platforms that may audit your source files.
Practical Implementation in Design Software
Once you have planned your project dimensions and color direction, importing the PNG into your chosen software is the next step. Whether you use Adobe Photoshop, Illustrator, Affinity, Canva, Procreate, or a free alternative like GIMP or Krita, the process remains similar.
Working with Transparency
The PNG includes a transparent background, which means you can drop it onto any colored surface without having to manually remove a white box. However, check the edges of the graphic at high zoom. Sometimes PNG compression can leave a faint halo around detailed areas. If you see one, a quick "remove background" step or using a layer mask to clean up the edges ensures a professional finish.
If you are layering the graphic over a patterned background, test the contrast. The pink and mint tones may blend into similarly colored backgrounds. A subtle drop shadow or a white stroke around the entire graphic can separate it from the background without altering the artwork itself.
Resizing Without Quality Loss
Because this is a raster file, enlarging it beyond its native dimensions introduces pixelation. To maintain quality, only scale the graphic down or keep it at its original size. If your project requires a larger version, consider using the graphic as a central element and building your layout around that size, rather than forcing the graphic to fill the entire canvas. Alternatively, you can place the PNG in a vector document and apply a slight blur and sharpening pass if you must scale up moderately, but this is a workaround, not a guarantee of crisp results.
Combining with Other Assets
The Christmas Snowman Tree Coquette PNG works well as a standalone image, but you can extend its utility by pairing it with typography, borders, or additional seasonal graphics. For example, on a greeting card, you might place the graphic on the front cover and add a short holiday message in a font that matches the retro feel—something with rounded serifs or a slight script style. For a mug design, wrapping the graphic around the curve of the cylinder requires positioning it off-center so it remains visible from the front view.
Use Cases Across Different Project Types
The versatility of this PNG becomes clear when you map it to specific products and platforms. Below are several common applications with workflow notes for each.
Print-on-Demand Products
For sellers on platforms like Printful, Printify, Redbubble, or Amazon Merch, the PNG can be uploaded directly as a design layer. Key considerations include:
- Mockup generation: Use the PNG on a transparent background overlay in a product mockup template. Position the graphic so it sits within the printable area of the item.
- Color matching: If the product comes in multiple colors, test the graphic against light and dark base colors. The pink and mint tones show best on white, cream, light gray, or pastel backgrounds. On dark colors, you may need a white backing layer behind the graphic.
- File format for upload: Most POD platforms accept PNG with transparency. Keep the file under the platform's size limit (often 25MB or less) and ensure the longest dimension matches the required resolution for that product type.
Greeting Cards and Stationery
Card design benefits from the full scene because it eliminates the need to compose multiple elements. You can use the PNG as the primary cover image, then add interior text. For a flat card, export at 300 DPI with a bleed area (typically 0.125 inches on each side) so the printer has room to trim. For a folded card, place the graphic on the front panel and leave the back panel for branding or a continuation of the design.
Digital Content and Social Media
Bloggers, social media managers, and email marketers can use the PNG as a seasonal header image or a post graphic. Because it is a single file, it loads quickly and requires no additional compositing. To adapt it for different aspect ratios—square for Instagram, 16:9 for YouTube thumbnails, or 4:3 for blog posts—add padding around the graphic or crop it slightly while keeping the main elements centered.
For email newsletters, insert the PNG as an inline image. The transparent background ensures it blends with the email's background color, but test rendering across email clients. Some older clients do not support transparency well, so consider adding a solid background color behind the graphic in your email builder.
Home Decor and Textiles
Pillows, totes, and framed prints are another natural fit. For textile items, the graphic should be sized to fit the print area. Work with your printer to confirm the maximum print dimensions and whether they recommend a specific file format. For framed prints, match the aspect ratio of the PNG to the frame size as closely as possible to avoid excessive cropping.
Organization and Long-Term Asset Management
Once you have used the PNG in one or more projects, storing it properly ensures you can reuse it in future seasons without re-downloading or searching through cluttered folders.
File Naming and Metadata
Rename the ZIP folder and the PNG file with a descriptive convention that includes the theme, year, and version. For example:
2025_Christmas_Snowman_Tree_Coquette_PNG_v1.png
If you modify the file—by resizing, adding effects, or combining it with other elements—save the derivative as a new file and keep the original untouched. This way you always have a clean source to return to.
Folder Structure
Create a folder hierarchy that separates source assets from project files. A simple structure might look like:
- Assets / Graphics / Holidays / Christmas – contains the original PNG and any variations you create.
- Projects / 2025 / Christmas Cards – contains your working files that use the PNG.
This separation prevents accidental overwrites and makes it easier to locate the asset when you need it for a new project next year.
Backing Up Your Assets
PNG files are lightweight, so backing them up to cloud storage or an external drive takes minimal space. Include the terms and conditions text file from the ZIP folder in the same location. If you ever need to verify usage rights, having that document on hand saves time.
Quality Control Checks Before Final Output
Before you send a design to print or publish it online, run through a brief checklist that focuses on the asset itself.
- Check for pixelation: View the graphic at 100% zoom in your design software. If you scaled it up, confirm that edges remain sharp.
- Verify transparency: Export a test file and open it in a separate viewer to ensure the background is truly transparent and not accidentally filled with white.
- Review color accuracy: If printing, soft-proof the design using your printer's ICC profile. Neon or highly saturated pinks may shift during printing, so adjust if needed.
- Confirm alignment: If the graphic sits near a fold, seam, or trim line, shift it away from that edge by at least 0.25 inches to avoid cutting off important details.
Adapting the Graphic for Recurring Holiday Seasons
The Christmas Snowman Tree Coquette PNG does not have to be a one-time-use asset. With small adjustments, you can extend its life across multiple seasons or variations.
For example, if you create a series of holiday cards, you can use the same PNG but change the background color, add a different border, or pair it with new typography each year. The core illustration remains consistent, giving your product line a cohesive look while allowing for fresh presentation. Because the PNG is a static raster, you cannot easily recolor individual elements within it, but you can overlay a color filter or gradient on a duplicate layer to shift its mood slightly.
If you work across different brands or client projects, treat the PNG as part of a larger design library. Keep notes on which projects used the asset and whether the client provided feedback on the style. Over time, these observations help you decide which types of graphics to invest in for future seasons.
Final Observations on Workflow Integration
Assets like the Christmas Snowman Tree Coquette PNG serve a specific function in a creative pipeline: they reduce the time spent on illustration and composition so you can focus on layout, production, and distribution. The practical value lies not in the graphic's standalone beauty but in how efficiently it moves from file to finished product.
By planning your project dimensions, output medium, and color strategy before you open the file, you avoid rework. By understanding the licensing terms, you protect your business from compliance issues. And by organizing the asset within a clear folder structure, you build a library that grows in usefulness each season.
Whether you are producing a single mug for a gift shop or a full line of holiday merchandise, treating this PNG as a component in a repeatable process—rather than a one-off decoration—gives you more control over your timeline and your final quality.